

Confluence Data Source
Guide to configuring Confluence as a data source in LlamaCloud, including UI, API, client setup, and OAuth 2.0 token creation.
Load data from Confluence
Configure via UI
Section titled “Configure via UI”Basic Authentication
Section titled “Basic Authentication”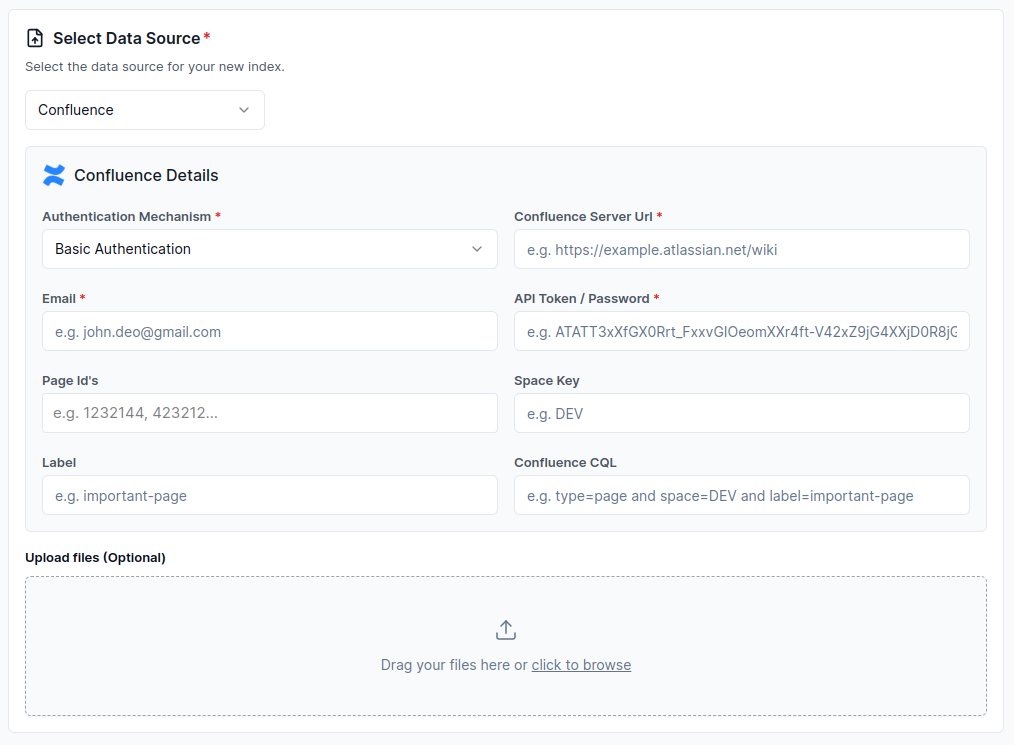
Configure via API / Client
Section titled “Configure via API / Client”from llama_cloud.types.data_source_create_params import ( CloudConfluenceDataSource,)
data_source = client.data_sources.create( name="my-data-source", component=CloudConfluenceDataSource( server_url='<server_url>', user_name='<user_name>', api_token='<api_token>', space_key='<space_key>', # optional page_ids='<page_ids>', # optional cql='<cql>', # optional label='<label>', # optional ), source_type="CONFLUENCE", project_id="my-project-id",)const dataSource = await client.dataSources.create({ name: 'my-data-source', component: { server_url: '<server_url>', user_name: '<user_name>', api_token: '<api_token>', space_key: '<space_key>', // optional page_ids: '<page_ids>', // optional cql: '<cql>', // optional label: '<label>', // optional }, source_type: 'CONFLUENCE', project_id: 'my-project-id',});from llama_cloud.types import CloudConfluenceDataSource
ds = { 'name': '<your-name>', 'source_type': 'CONFLUENCE', 'component': CloudConfluenceDataSource( server_url='<server_url>', user_name='<user_name>', api_token='<api_token>', space_key='<space_key>', # optional page_ids='<page_ids>', # optional cql='<cql>', # optional label='<label>', # optional )}data_source = client.data_sources.create_data_source(request=ds)const ds = { 'name': '<your-name>', 'sourceType': 'CONFLUENCE', 'component': { 'server_url': 'server_url', 'user_name': '<user_name>', 'api_token': '<api_token>', 'space_key': '<space_key>', // optional 'page_ids': '<page_ids>', // optional 'cql': '<cql>', // optional 'label': '<label>', // optional }};
const dataSource = await client.dataSources.createDataSource({ body: ds});Instances without a functional search index
Section titled “Instances without a functional search index”By default, the pages in a space are enumerated through Confluence’s CQL search
API (rest/api/content/search), which depends on the instance’s search index.
On Confluence Server/Data Center instances where the search index is unavailable
or disabled, credential validation succeeds but syncs fetch zero pages, because
CQL silently returns no results.
For those instances, set the deployment-level configuration
DEFAULT_CONFLUENCE_V2_SOURCE_SEARCH_METHOD=content_api (default: cql). Pages
are then listed through the database-backed content API (rest/api/content)
instead. This is an environment/self-hosting setting rather than a per–data
source option, and it applies to space_key sources only — the cql and
label filters are always served by the search API.
Guide to create an OAuth 2.0 token:
Section titled “Guide to create an OAuth 2.0 token:”A step-by-step guide to creating an OAuth 2.0 token and using it to fetch data from a Confluence space. It includes instructions on setting up an OAuth 2.0 app in the Atlassian Developer Console, obtaining an access token, and making API requests using the token.
1. Prerequisites
Section titled “1. Prerequisites”- An Atlassian account.
- Access to the Atlassian Developer Console.
- Basic knowledge of OAuth 2.0 and API requests.
- A Confluence account with the necessary permissions.
2. Setting Up the OAuth 2.0 App
Section titled “2. Setting Up the OAuth 2.0 App”- Go to the Atlassian Developer Console.
- Log in with your Atlassian account.
- Click on your profile icon in the top-right corner and select
Developer console. - Click on
Create app. - Enter the app name and click
Create. - In your app’s settings, go to
Authorizationin the left menu. - Next to OAuth 2.0 (3LO), click
Configure https://auth.atlassian.com/oauth/token. - Enter the Callback URL (this is the URL that will handle the OAuth callback).
- Click
Save changes. - Go to
Permissionsin the left menu. - Next to the Confluence API, click
Add. - Select the necessary scopes (e.g., read:confluence-space.summary).
3. Implementing OAuth 2.0 (3LO) in Your App
Section titled “3. Implementing OAuth 2.0 (3LO) in Your App”- Direct the User to the Authorization URL:
https://auth.atlassian.com/authorize?audience=api.atlassian.com&client_id=YOUR_CLIENT_ID&scope=read:confluence-space.summary&redirect_uri=YOUR_APP_CALLBACK_URL&state=YOUR_USER_BOUND_VALUE&response_type=code&prompt=consent-
Replace the placeholders with the appropriate values:
YOUR_CLIENT_ID: The client ID of your app.YOUR_APP_CALLBACK_URL: The callback URL configured in your app settings.YOUR_USER_BOUND_VALUE: A unique value to maintain state between the request and callback.
-
Exchange the Authorization Code for an Access Token:
Once the user grants access, they will be redirected to your callback URL with an authorization code. Use this code to obtain an access token:
curl --request POST \--url 'https://auth.atlassian.com/oauth/token' \--header 'Content-Type: application/json' \--data '{"grant_type": "authorization_code","client_id": "YOUR_CLIENT_ID","client_secret": "YOUR_CLIENT_SECRET","code": "YOUR_AUTHORIZATION_CODE","redirect_uri": "YOUR_APP_CALLBACK_URL"}'Replace the placeholders with the appropriate values:
YOUR_CLIENT_ID: The client ID of your app.YOUR_CLIENT_SECRET: The client secret of your app.YOUR_AUTHORIZATION_CODE: The authorization code received from the callback.YOUR_APP_CALLBACK_URL: The callback URL configured in your app settings.
4. Fetching Data Using the Access Token:
Section titled “4. Fetching Data Using the Access Token:”-
Get the Cloud ID: Use the access token to get the cloud ID for your Confluence site:
curl --request GET \--url 'https://api.atlassian.com/oauth/token/accessible-resources' \--header 'Authorization: Bearer YOUR_ACCESS_TOKEN' \--header 'Accept: application/json'Replace
YOUR_ACCESS_TOKENwith the actual access token received in the previous step. -
Read the Space: Use the cloud ID and access token to make a request to read the space:
curl --request GET \--url 'https://api.atlassian.com/ex/confluence/CLOUD_ID/rest/api/space' \--header 'Authorization: Bearer YOUR_ACCESS_TOKEN' \--header 'Accept: application/json'
User Inputs: Replace the placeholders with the appropriate values:•
CLOUD_ID: The cloud ID of your Confluence site.YOUR_ACCESS_TOKEN: The actual access token received in the previous step.